
From Blog to Video with AI: Building an Automated Multimodal Pipeline
Imagine writing a blog post and turning it into a narrated video — complete with visuals — entirely through AI. No manual video editing, no graphic design, no voice recording. Just a sequence of automated steps powered by different generative AI models, each contributing to a part of the creative process.
This project demonstrates exactly that: a fully automated pipeline that takes a piece of long-form text and transforms it into a complete video, using a modular chain of state-of-the-art AI tools. The result is an illustration of how modern AI can work across different modalities (text, image, audio) to streamline content creation at scale.
The goal of this blog is to showcase the technologies used, explain the logic behind each step, and offer a transparent look at what is happening under the hood. You will see how language models generate structure and narrative, how diffusion models turn those ideas into visuals, and how text-to-speech systems bring the story to life. Finally, everything is brought together into a cohesive video using standard video tools.
Here is an example of the final result — a video automatically generated from a blog post using the pipeline described above:
👉 Watch on YouTube
This post is part of the Generative AI Lab, a public repository that explores creative and practical uses of LLMs, Vision-Language Models (VLMs), and multimodal AI pipelines. If you are curious about how these systems can be chained together to automate creative workflows, feel free to explore the other blogs in the repository to discover more exciting applications.
📚 Table of Contents
- 🧩 Pipeline Overview
- ✍️ Step 1: Generate the Blog Structure with an LLM
- ✍️ Step 2: Write Paragraphs for Each Section Using an LLM
- 🎨 Step 3: Create Visuals for Each Section with a Text-to-Image Model
- 🔊 Step 4: Generate Audio Narration with a Text-to-Speech Model
- 🎬 Step 5: Combine Frames and Audio into the Final Video
- 🚀 Story to Screen: One AI Prompt at a Time
🧩 Pipeline Overview
This project is structured as a modular pipeline, where each stage of the transformation — from raw text to final video — is handled by a distinct type of generative AI model. These components work together seamlessly, each contributing to a specific part of the process, resulting in a fully automated content creation flow.
Here is a high-level view of the pipeline and the technologies powering each stage:
| Task | Technology Used |
|---|---|
| Generate blog outline | LLM (text to text) |
| Write paragraphs per section | LLM (text to text) |
| Generate visuals | Diffusion model (text to image) |
| Generate audio narration | Text-to-Speech model (text to audio) |
| Assemble video | Video processing |
No manual video editing. No human narration. Just prompt → code → video.
📘 You can explore the full pipeline here: Full Notebook: Blog-to-Video AI Generator
✍️ Step 1: Generate the Blog Structure with an LLM
The first step of the pipeline involves producing the structural outline of the blog — consisting of a title and a list of section headings that will later be expanded into full content blocks. To achieve this, a model capable of natural language generation was required.
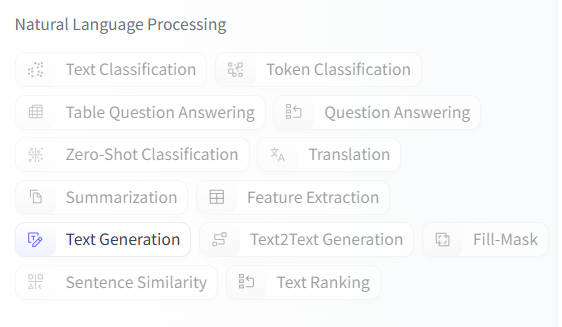
This task falls under the broader field of Natural Language Processing (NLP). Within NLP, there are multiple task categories such as text classification, translation, question answering, and summarization. In this case, the pipeline requires text generation, which involves generating free-form text continuations from prompts — making it the most appropriate NLP category for producing creative content like titles and section headers.
For this purpose, the mistralai/Mistral-7B-Instruct-v0.1 model was used. Mistral-7B is a publicly available, instruction-tuned language model with 7 billion parameters, designed to follow prompts in a controlled and context-aware manner. According to its official release, the model was trained using a high-quality dataset and optimized for instruction-based tasks, making it particularly suitable for use cases such as content planning, summarization, and completion.
The model was loaded using 4-bit quantization (BitsAndBytes), allowing reduced memory usage without a major sacrifice in output quality. This makes the setup compatible with typical consumer GPUs or free-tier Google Colab environments.
The generation process consists of two parts:
- Blog title generation — A short and humorous blog title is generated based on a free-form prompt, avoiding cliched formats like “10 ways to…”.
- Section heading generation — The title is used as a seed prompt, and the model generates five structured section headings formatted as a numbered list.
Sampling techniques such as top_k=50 and temperature=0.9 were applied to encourage creativity and variation in the generated content. The result is a dynamic, well-formed blog skeleton suitable for subsequent content expansion and visual narration.
🔍 Why Mistral-7B?
Mistral-7B-Instruct was chosen for several reasons:
- It is open-access, with weights available on Hugging Face, making it easy to integrate, experiment with, and deploy.
- It offers strong instruction-following capabilities, crucial for structured outputs like numbered lists and outlines.
- Its 7B size provides a good balance between generation quality and inference speed, especially when quantized.
- It is part of a well-maintained family of models with continuous updates and community adoption.
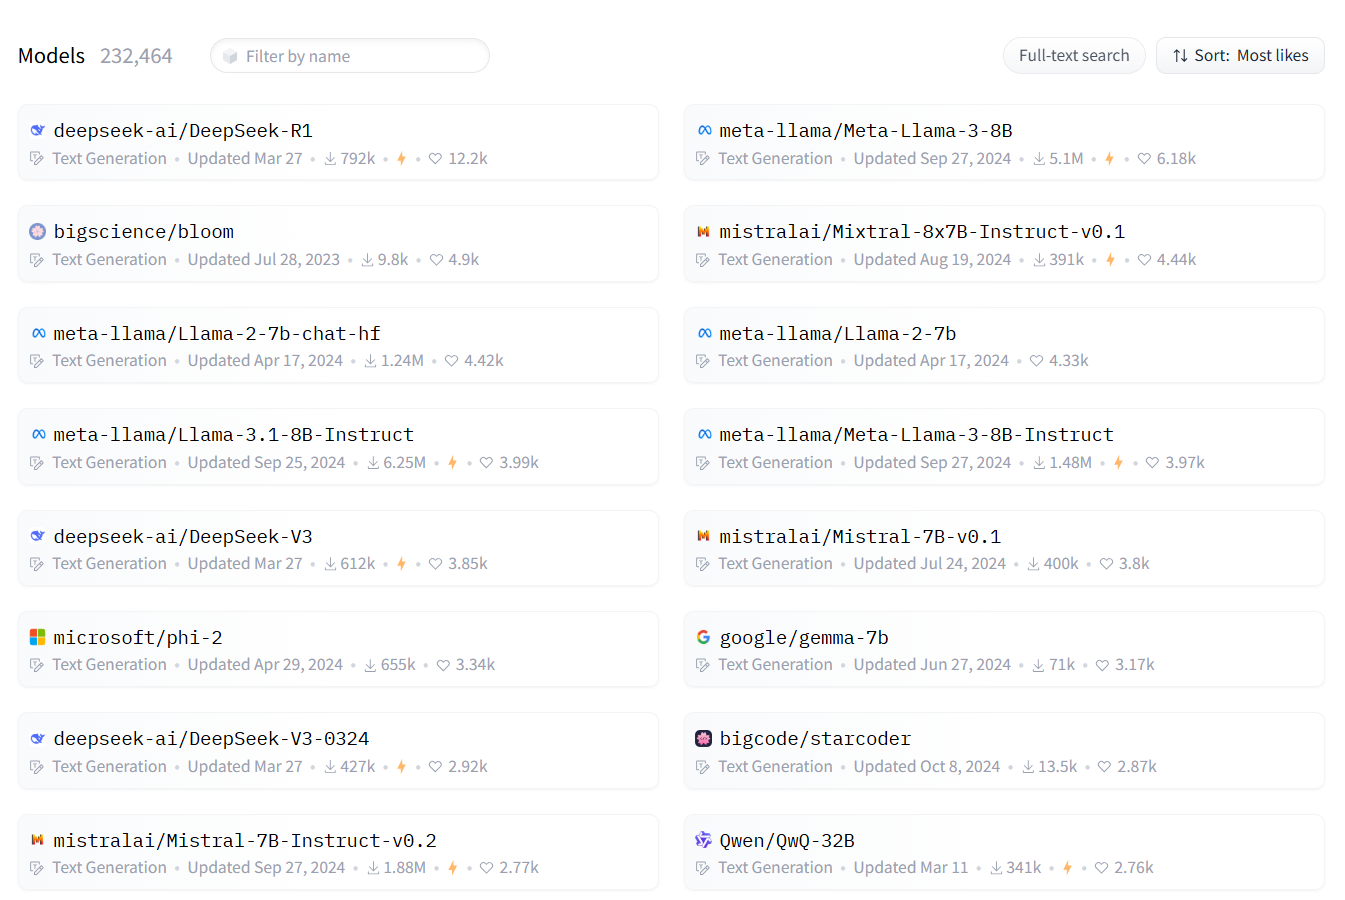
In addition to Mistral, Hugging Face hosts a wide range of open text generation models such as LLaMA 2, DeepSeek, gemma, and Phi-2, each with different strengths in terms of size, speed, multilingual capabilities, and alignment.
A curated list of popular open-access models for text generation can be explored at:
🔗 Text generation models on Hugging Face 🤗
Choosing the right model depends on several factors — including the target task, the hardware environment, and the desired trade-off between output quality and inference latency. In this case, Mistral was selected due to its accessibility, fine-tuned prompt handling, and efficiency in resource-constrained setups.
Instruction-tuned LLMs such as Mistral are highly effective at generating structured, natural-sounding completions from minimal prompts, making them ideal candidates for the first stage of a creative generation pipeline.
✍️ Step 2: Write Paragraphs for Each Section Using an LLM
With the blog structure in place, the next task is to expand each section into a short paragraph. Using the same instruction-tuned language model, we simply adjust the prompt to ask for a 2–3 sentence explanation for each section title.
This step shifts from structured output to longer-form generation. The model’s job is now to elaborate clearly and concisely, maintaining the tone and flow of the blog. Prompting is minimal — a short instruction and the section title — and the model handles the rest.
Each response becomes a building block of the final narrative, turning the outline into readable, engaging content. With just a loop and a well-crafted prompt, the blog starts to take shape.
📝 Section: “Venturing into the Unexplored”
Venturing into the unexplored is a thrilling experience that can challenge your beliefs and expand your horizons. Whether it is traveling to a new country, trying a new hobby, or exploring a new technology, stepping outside your comfort zone can be daunting but ultimately rewarding. As you embark on this journey, you will discover new things about yourself and the world around you. You will learn to adapt to new situations and overcome obstacles. And while there may be moments of frustration or fear, the sense of accomplishment and growth you will experience will make it all worth it. So go ahead and venture into the unknown – you never know what amazing things you might discover.
As you can see, the content does not always stay laser-focused — a common side effect when using general prompts with open-ended models. Still, it is a solid base for automated first drafts.
🎨 Step 3: Create Visuals for Each Section with a Text-to-Image Model
Once the textual structure of the blog is in place, the next step is to give it visual form. This is achieved by using text-to-image diffusion models, which generate images from descriptive prompts derived from the blog sections.
This step falls under the broader domain of generative vision models, specifically those optimized for Text-to-Image generation. These models take a piece of text and render it into a high-resolution image that attempts to reflect the semantics and visual tone of the input.
Popular models for this task include:
- Stable Diffusion — known for speed and flexibility
- Kandinsky — capable of producing more surreal, artistic outputs
- DeepFloyd IF — a cascaded diffusion model offering higher fidelity and text rendering
- OpenJourney — fine-tuned on artistic styles, often used for illustration-style outputs
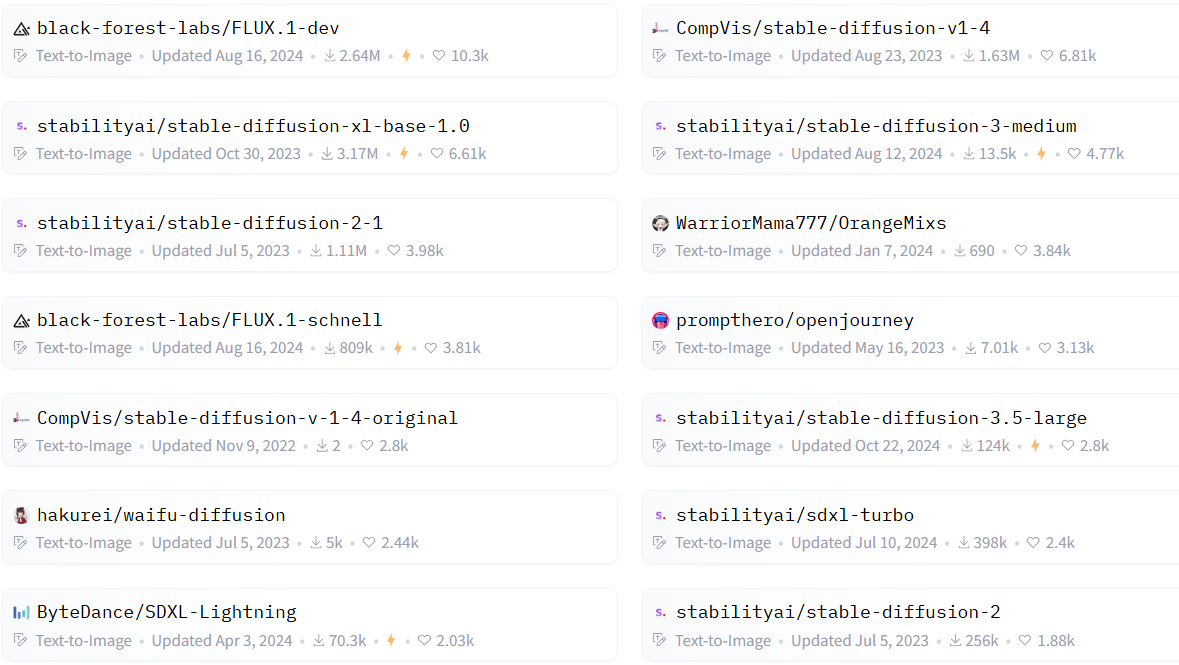
These models are available openly on Hugging Face and can be selected based on style preferences, speed, or compute requirements. A curated list of the most popular text-to-image models can be found here:
🔗 Text-to-image models on Hugging Face 🤗
Each model interprets prompts differently, often adding its own visual biases, quirks, or limitations in rendering objects, text, or scenes accurately. Despite these variabilities, the outputs are often surprisingly creative — especially when used for conceptual storytelling or illustrative scenes.
🐱 Example
One of the generated blog titles was:
The Purrfect Guide to Tech: How My Cat is Revolutionizing Digital Communication
Passing this title through the text-to-image pipeline produced the following visual:
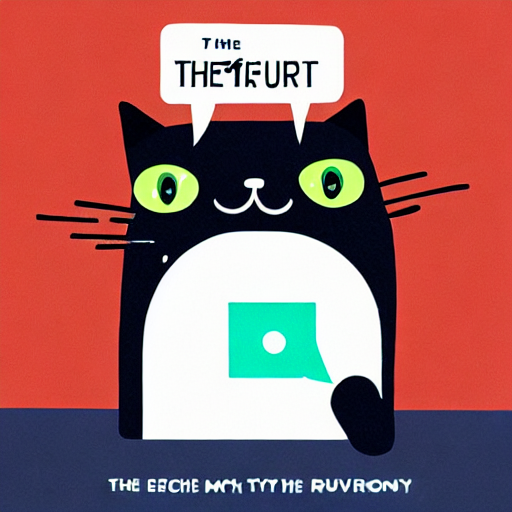
While the result is clearly surreal and the “text” in the image is nonsensical — a known limitation of most diffusion models — the overall composition, palette, and expressiveness capture the quirky tone of the title impressively well.
This highlights both the strengths and constraints of text-to-image models: they excel at general artistic representation and capturing mood or metaphor, but often struggle with textual accuracy or literal object layouts. Nonetheless, for storytelling, branding, or explainer videos, these visuals offer enormous value with zero manual design work.
🔊 Step 4: Generate Audio Narration with a Text-to-Speech Model
With the text content and visuals in place, the next step is to give the blog a voice. This is accomplished through a Text-to-Speech (TTS) model, which converts written sections into spoken audio that can be used as narration in the final video.
For this purpose, an English voice model from the Coqui TTS ecosystem was used. Coqui offers a well-documented, open-source framework with high-quality, pre-trained models that support multiple voices and accents. The selected model was trained on the VCTK dataset and is based on the VITS (Variational Inference Text-to-Speech) architecture, known for its ability to produce fluent and natural-sounding speech.
This model was chosen for several reasons:
- It is open-access, and easy to integrate into Python-based pipelines without external APIs or licensing restrictions.
- It delivers high-quality prosody and pronunciation in English, with consistent tone and pacing suitable for narration.
- It supports speaker control, enabling future extensions with voice style transfer or multi-speaker narration.
- Unlike more compact or older models, it handles paragraph-length inputs with minimal drift or repetition.
Other available TTS models, such as those from Mozilla TTS, Bark, or Festival, either lack support for modern features like expressive prosody, or require more fine-tuning and configuration to achieve similar quality. The Coqui VITS model offers a practical compromise between ease of use and audio fidelity — ideal for narration tasks in AI-generated video workflows.
🗣️ Example Output
This example demonstrates the clarity, rhythm, and fluency achievable with open-source TTS systems. While the model does not provide emotional nuance or personalized vocal identity, it serves well for explainer-style narration or prototyped storytelling.
In the context of this pipeline, each section of the blog is narrated independently and later synchronized with its corresponding visual. This modular design enables easy replacement or regeneration of specific segments without reprocessing the entire video.
🎬 Step 5: Combine Frames and Audio into the Final Video
At this point, all the essential components have been created — narrative text, AI-generated visuals, and corresponding audio narration. The final step is to bring everything together into a complete video.
This part of the pipeline does not involve any AI. It is a straightforward video processing task, where each image is paired with its corresponding audio segment and arranged sequentially. Tools like moviepy or ffmpeg are used to stitch the frames and narration into a cohesive timeline, add transitions if needed, and export the final video file.
Once rendered, the result is a fully automated, AI-assisted video generated from a simple text input — ready for sharing, publishing, or further editing.
🚀 Story to Screen: One AI Prompt at a Time
This project showcases how modern generative AI models — across text, image, and audio — can be orchestrated into a seamless, automated storytelling pipeline. By leveraging open-source tools and composable workflows, it is now possible to go from an idea or outline to a fully narrated, illustrated video with minimal human intervention.
While each individual component (language generation, image synthesis, speech synthesis) is powerful on its own, the real potential emerges when these modalities are combined. This multimodal approach opens up exciting possibilities for content automation, education, prototyping, and creative exploration.
The full pipeline is modular, extensible, and easy to adapt for other applications — whether it is transforming technical documentation, generating explainers, or building narrative-driven AI agents.
Thanks for reading — I hope you found it useful and insightful.
Feel free to share feedback, connect, or explore more projects in the Generative AI Lab.